- Online.packmage.com website account and Packmage cad client account have been connected, including account number, corresponding operation rights. If you purchased Packmage cad, you will have boxes’s access rights for both the client and this website. Packmage cad client download please go to https://www.packmage.com/Cad/CADdownLoad
#Tuning Parameter
#Texture 3D
i.Website Introduction
#Account number
#Interface function
 The upper left corner is the entrance of each functional area, mainly for parameter adjustment, mapping, 3D, box library. The upper right corner is the personal center, and the bottom area is the operation area of the current panel.
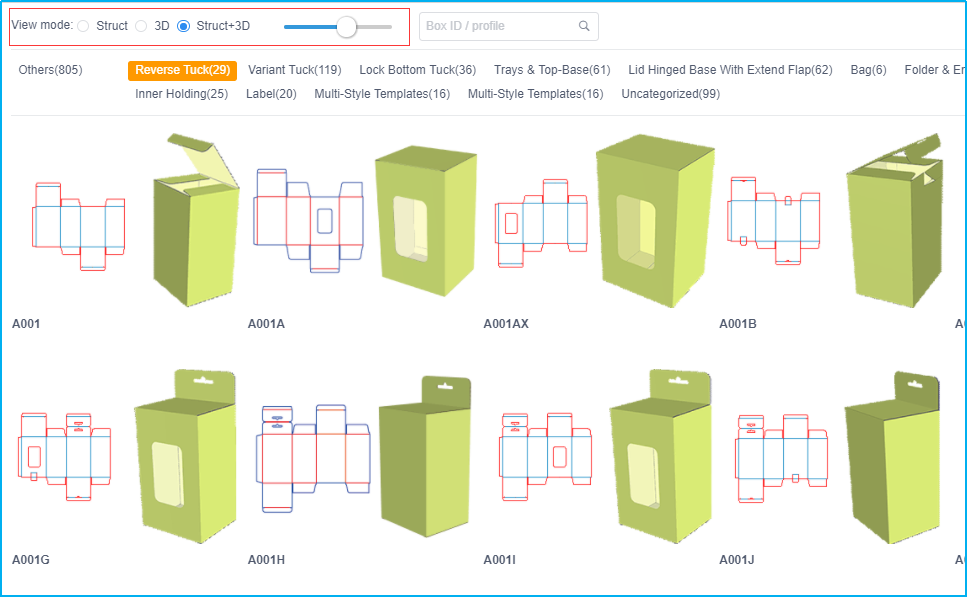
ii.Box Library
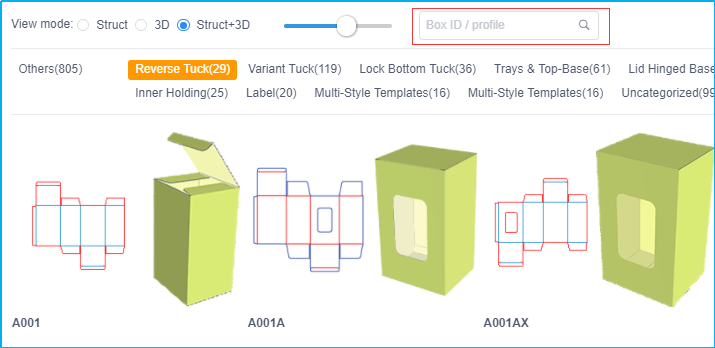
#Box display
-
The box can be presented in various forms. At the top of the interface, you can choose the expansion , the 3D , or the expansion + 3D.You can also adjust the size of the display of the box.
#Box Search
-
It can be retrieved according to the ID of the box type, the use (e.g. the medicine box), and the structural characteristics (e.g. the bottom button box).
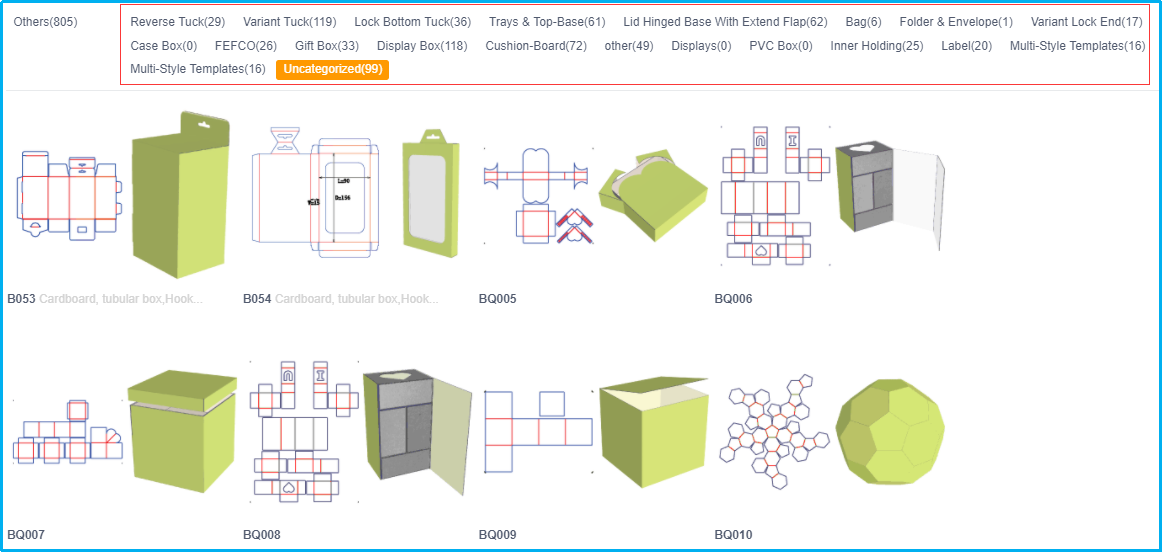
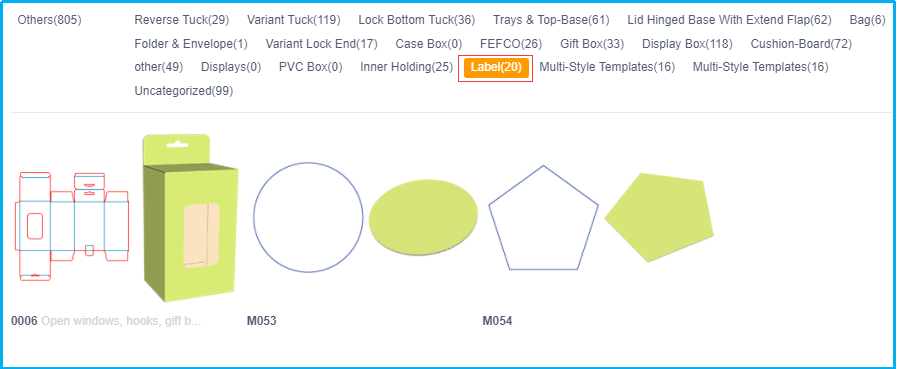
#Classification of box type
-
According to the material, structure and use, the system classifies the box library, and chooses a classification to select the current classification box.
#Classification settings of box type
-
In the personal Center - box Library Classification settings, you can select either single or multiple settings.
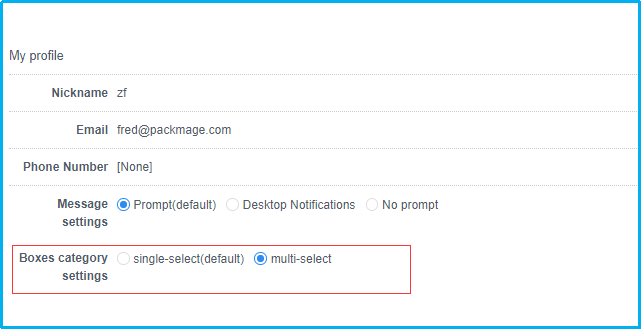
If it is set as a single selection, only one category can be selected at a time when choosing the classification of box libraries; if it is set as multiple selection, more than one category can be selected at a time when choosing the classification of box libraries.

iii.Adjustment of parameters
Click on a box in the box library and enter the parameter adjustment interface, which is the default interface of the platform.
#Bottom operation bar
-
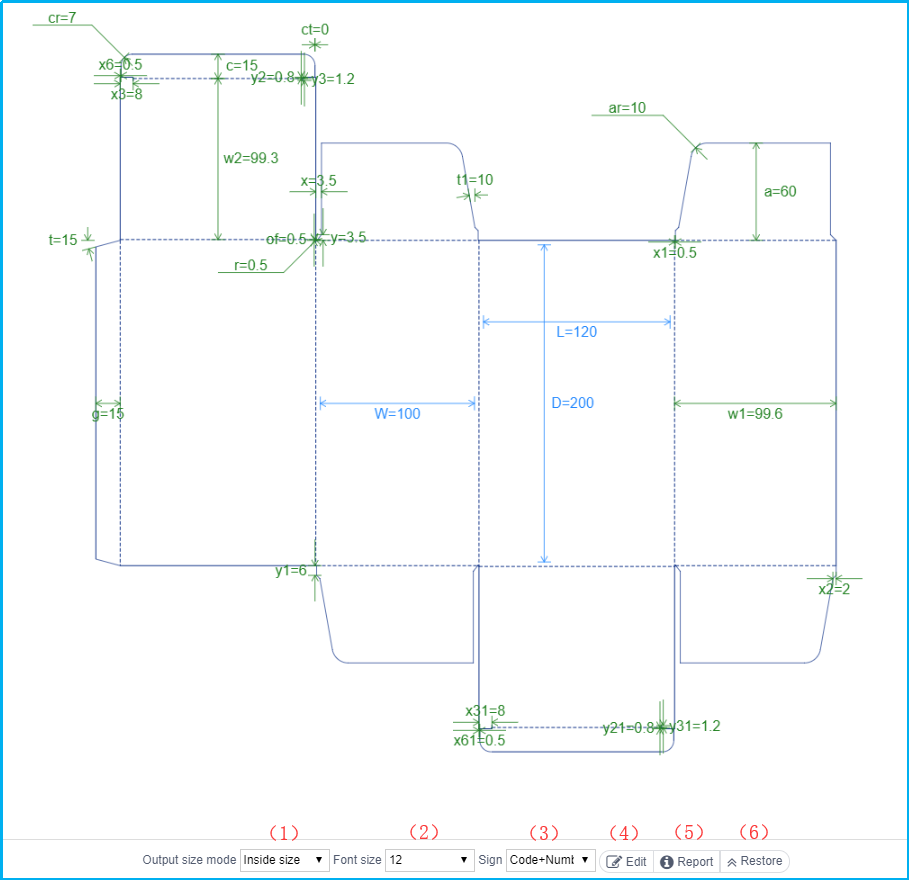 (1) Selection of box size types: internal size, external size, tool die size (manufacturing size). What is the difference between the three sizes?https://www.packmage.com/Cad/Document/470-B
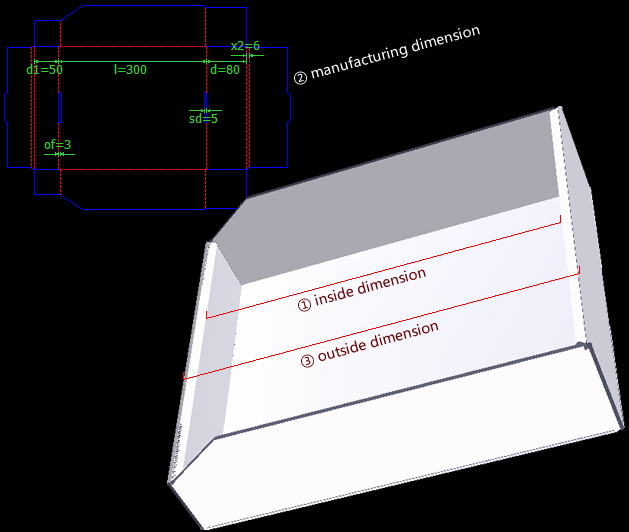 In general, please use the size of the cutter die to design.
(2)Size: The parameter font size of the parameter panel can be adjusted by adjusting the size.(3)Type of annotation:Different annotation methods can be selected according to the need.
In general, please use the size of the cutter die to design.
(2)Size: The parameter font size of the parameter panel can be adjusted by adjusting the size.(3)Type of annotation:Different annotation methods can be selected according to the need.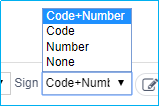 (4)Editor:Click Edit, you can open the parameter adjustment panel, click again, Close the parameter adjustment panel; you can also click on the parameters above the box to adjust the parameter panel.(5)Statistics:After clicking, the information about the total length and area of the current structural lines will be displayed in the upper right corner.
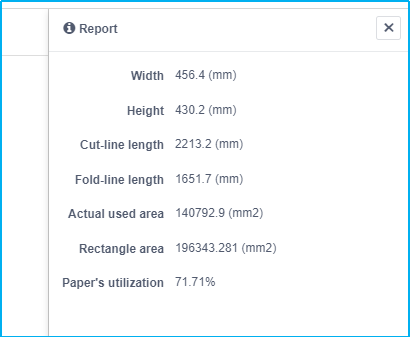 (6)reduction:After clicking, the box parameters will be restored to the default location.
#Parametric panel
-
Click on the parameters on the box expansion map, and the parameter adjustment panel will quickly locate that parameters.
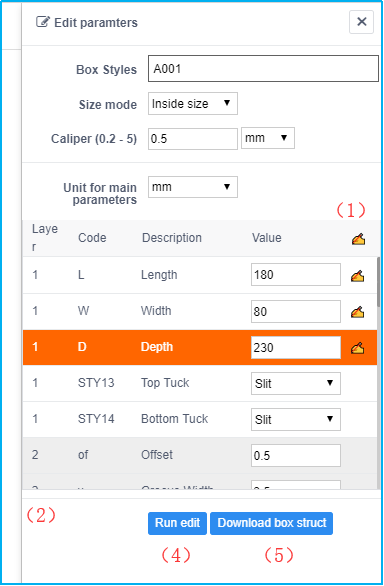
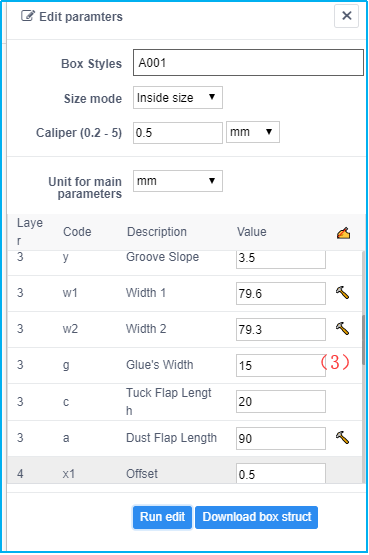 (1)Modified marking:Modified marking will appear after the modified parameters.(2)Parameter layer:Each parameter will have a parameter layer. After adjusting the parameters and calculating automatically, the parameter values will affect the values of other parameters in the lower layer, only from the lower layer to the higher layer.(3)Amendment logo:For example, after adjusting L (the first level), click on the parameter, parameter a (the third level) will be revised according to the value of L. After the system is revised, it can be revised again.(4)Parametric adjustment:After modifying the parameters, the system will need to click on the parametric adjustment before calculating.(5)Download box structure:After parameter adjustment is completed, Click to download the vector file of the current structure.
iv.Mapping
#Mapping
-
 (1)Advanced:1、click “Advanced”, and the setting window for the layer will pop up on the right, including adaptive width and height bleeding (after clicking“ adaptive width and height”, the picture will be automatically paved horizontally or vertically, and a certain bleeding distance will be reserved), scaling (adjust the level of scaling, click enlarge and shrink, and the larger the level, the larger the scale each time), moving (after setting the step, click Up, down, left and right, the larger the step, the greater the distance of each move), layer processing (drag the picture, you can set the upper and lower levels of the picture, click delete, delete the corresponding picture).
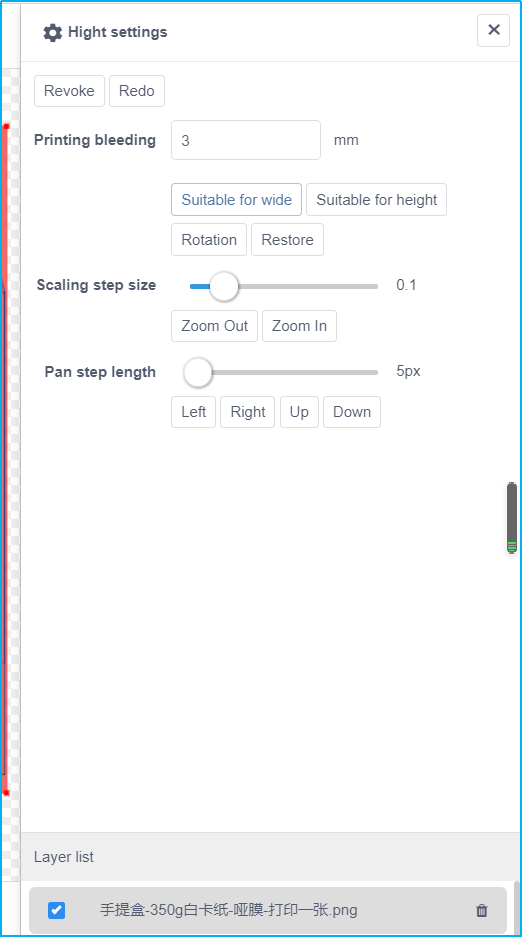 (2)Adaptive width: make the picture scale to the size corresponding to the horizontal direction of the display (including bleeding setting, consistent with the advanced floating window adaptive width function).(3)Adaptive height: make the picture scale to the size corresponding to the longitudinal direction of the display (including bleeding setting, consistent with the advanced floating window adaptive height function).(4)Rotation:the rotation plane design can rotate the picture 90-180-270 and other angles.(5)Restore:when the entire canvas is moved, click restore to return the entire canvas to the middle of the screen.(6)Import:multiple clicks and multiple pictures can be imported (jpg, PNG, PDF and other formats are supported).
v.3D
#3D
-
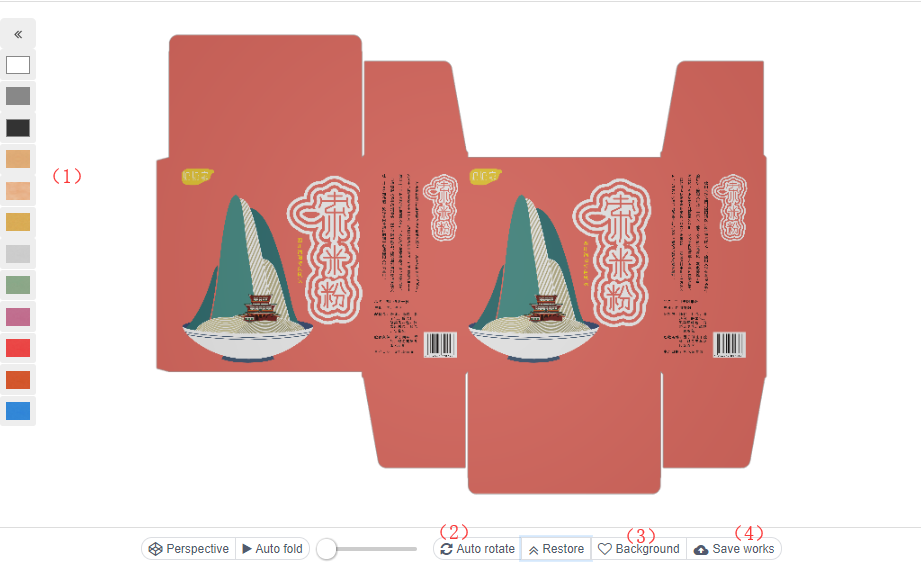 (1)Material rendering:The left side is material rendering. After choosing different materials, rotate the printing pattern to the back, and you can see the effect of the current material.
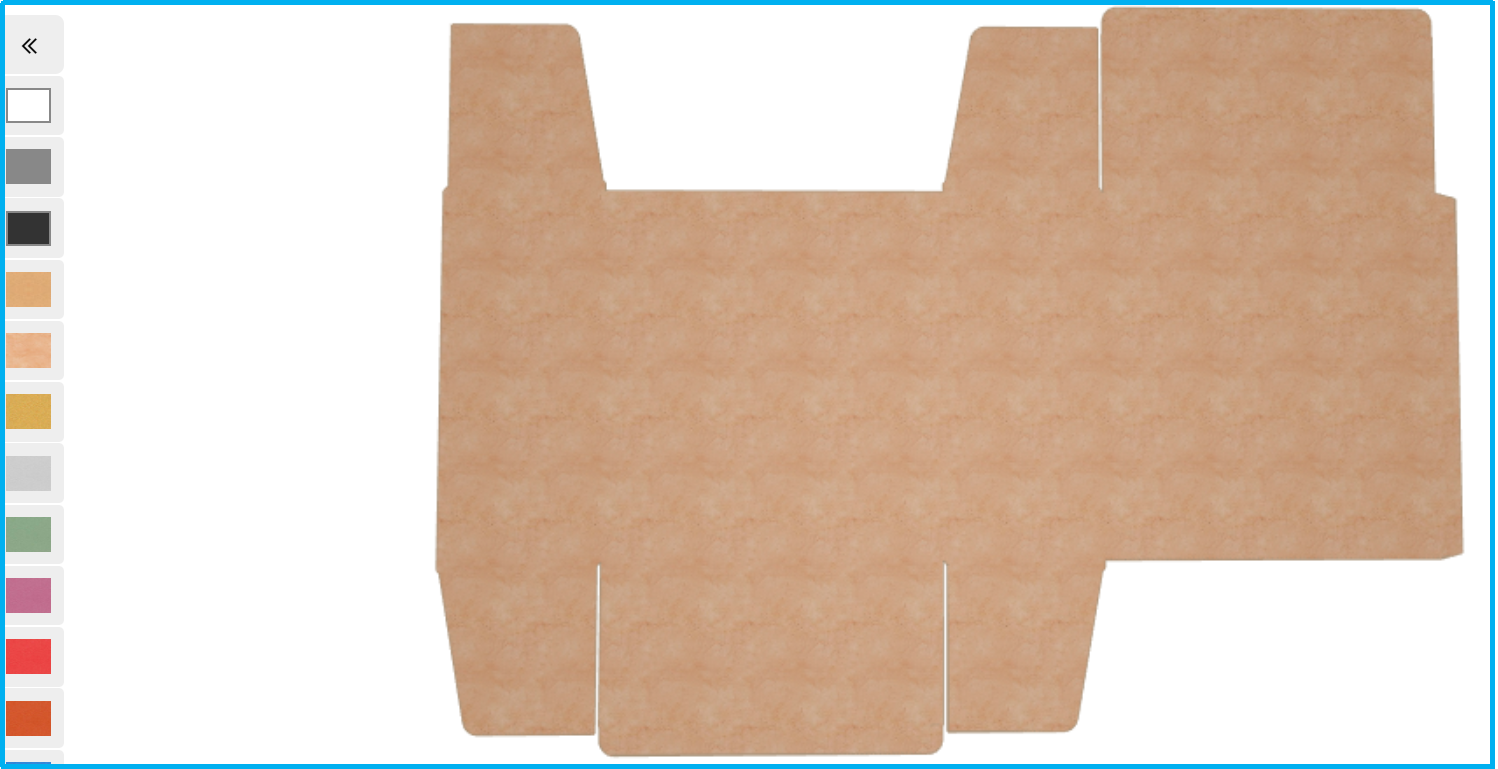 (2)3D operation:3D operation: the box can be perspective, fold, rotate and restore automatically.(3)Background effects:After clicking, special dynamic effects can be triggered.
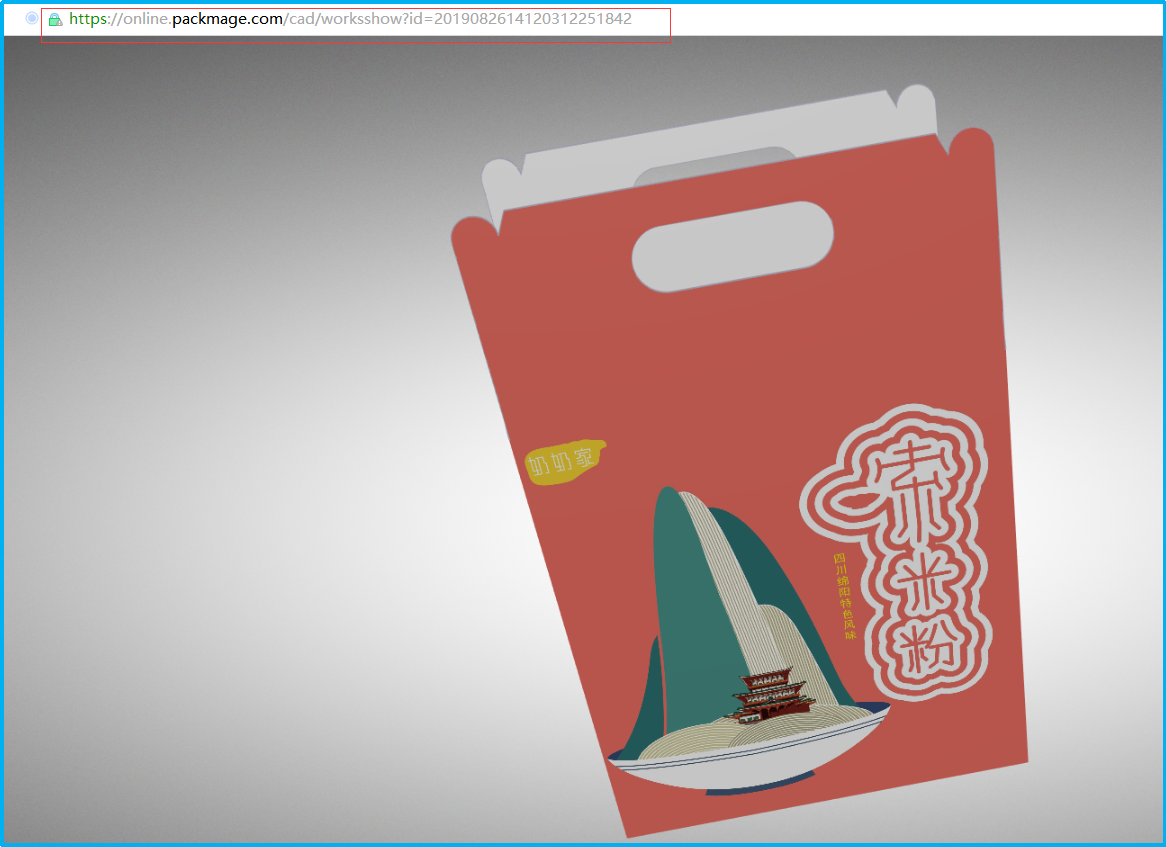
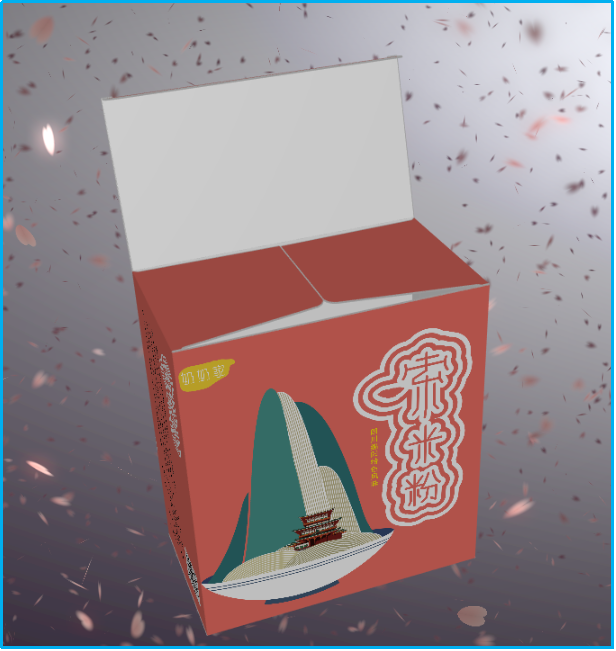 (4)Preserve works:Click to save works, you can save the current design in the cloud. After the work is saved successfully, you can open it below to get the cloud address (the address in the browser input box), which can be sent to others through the communication tool (Facebook) for viewing.
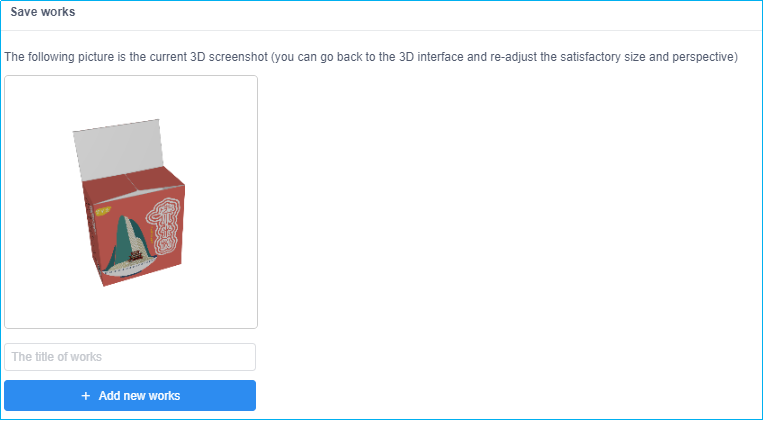
vi.My works
#My works
-
 1、Click the works to pop up the list of my works, and long press the left mouse button to scroll left and right.2、Click the blue name on the work to enter the corresponding parameter adjustment, mapping or 3D page of the current work, and you can edit the work again.3、Click the share on the right of the name to directly open the share link of the current work. You can directly copy the link address and send it to the people who need it through facebook or other social tools.